
Holy Sword Endu
PickupForged long ago by the ancestors of the Abraon family, this sword has spent countless generations slumbering on the Isle of Neasied.
 Queen’s Domain Atlas
Locate Holy Sword Endu, the two guardian encounters and the island’s collectibles. Pickup locations, evolution starting points and shop unlocks are listed separately.
Location and boss spoilers.
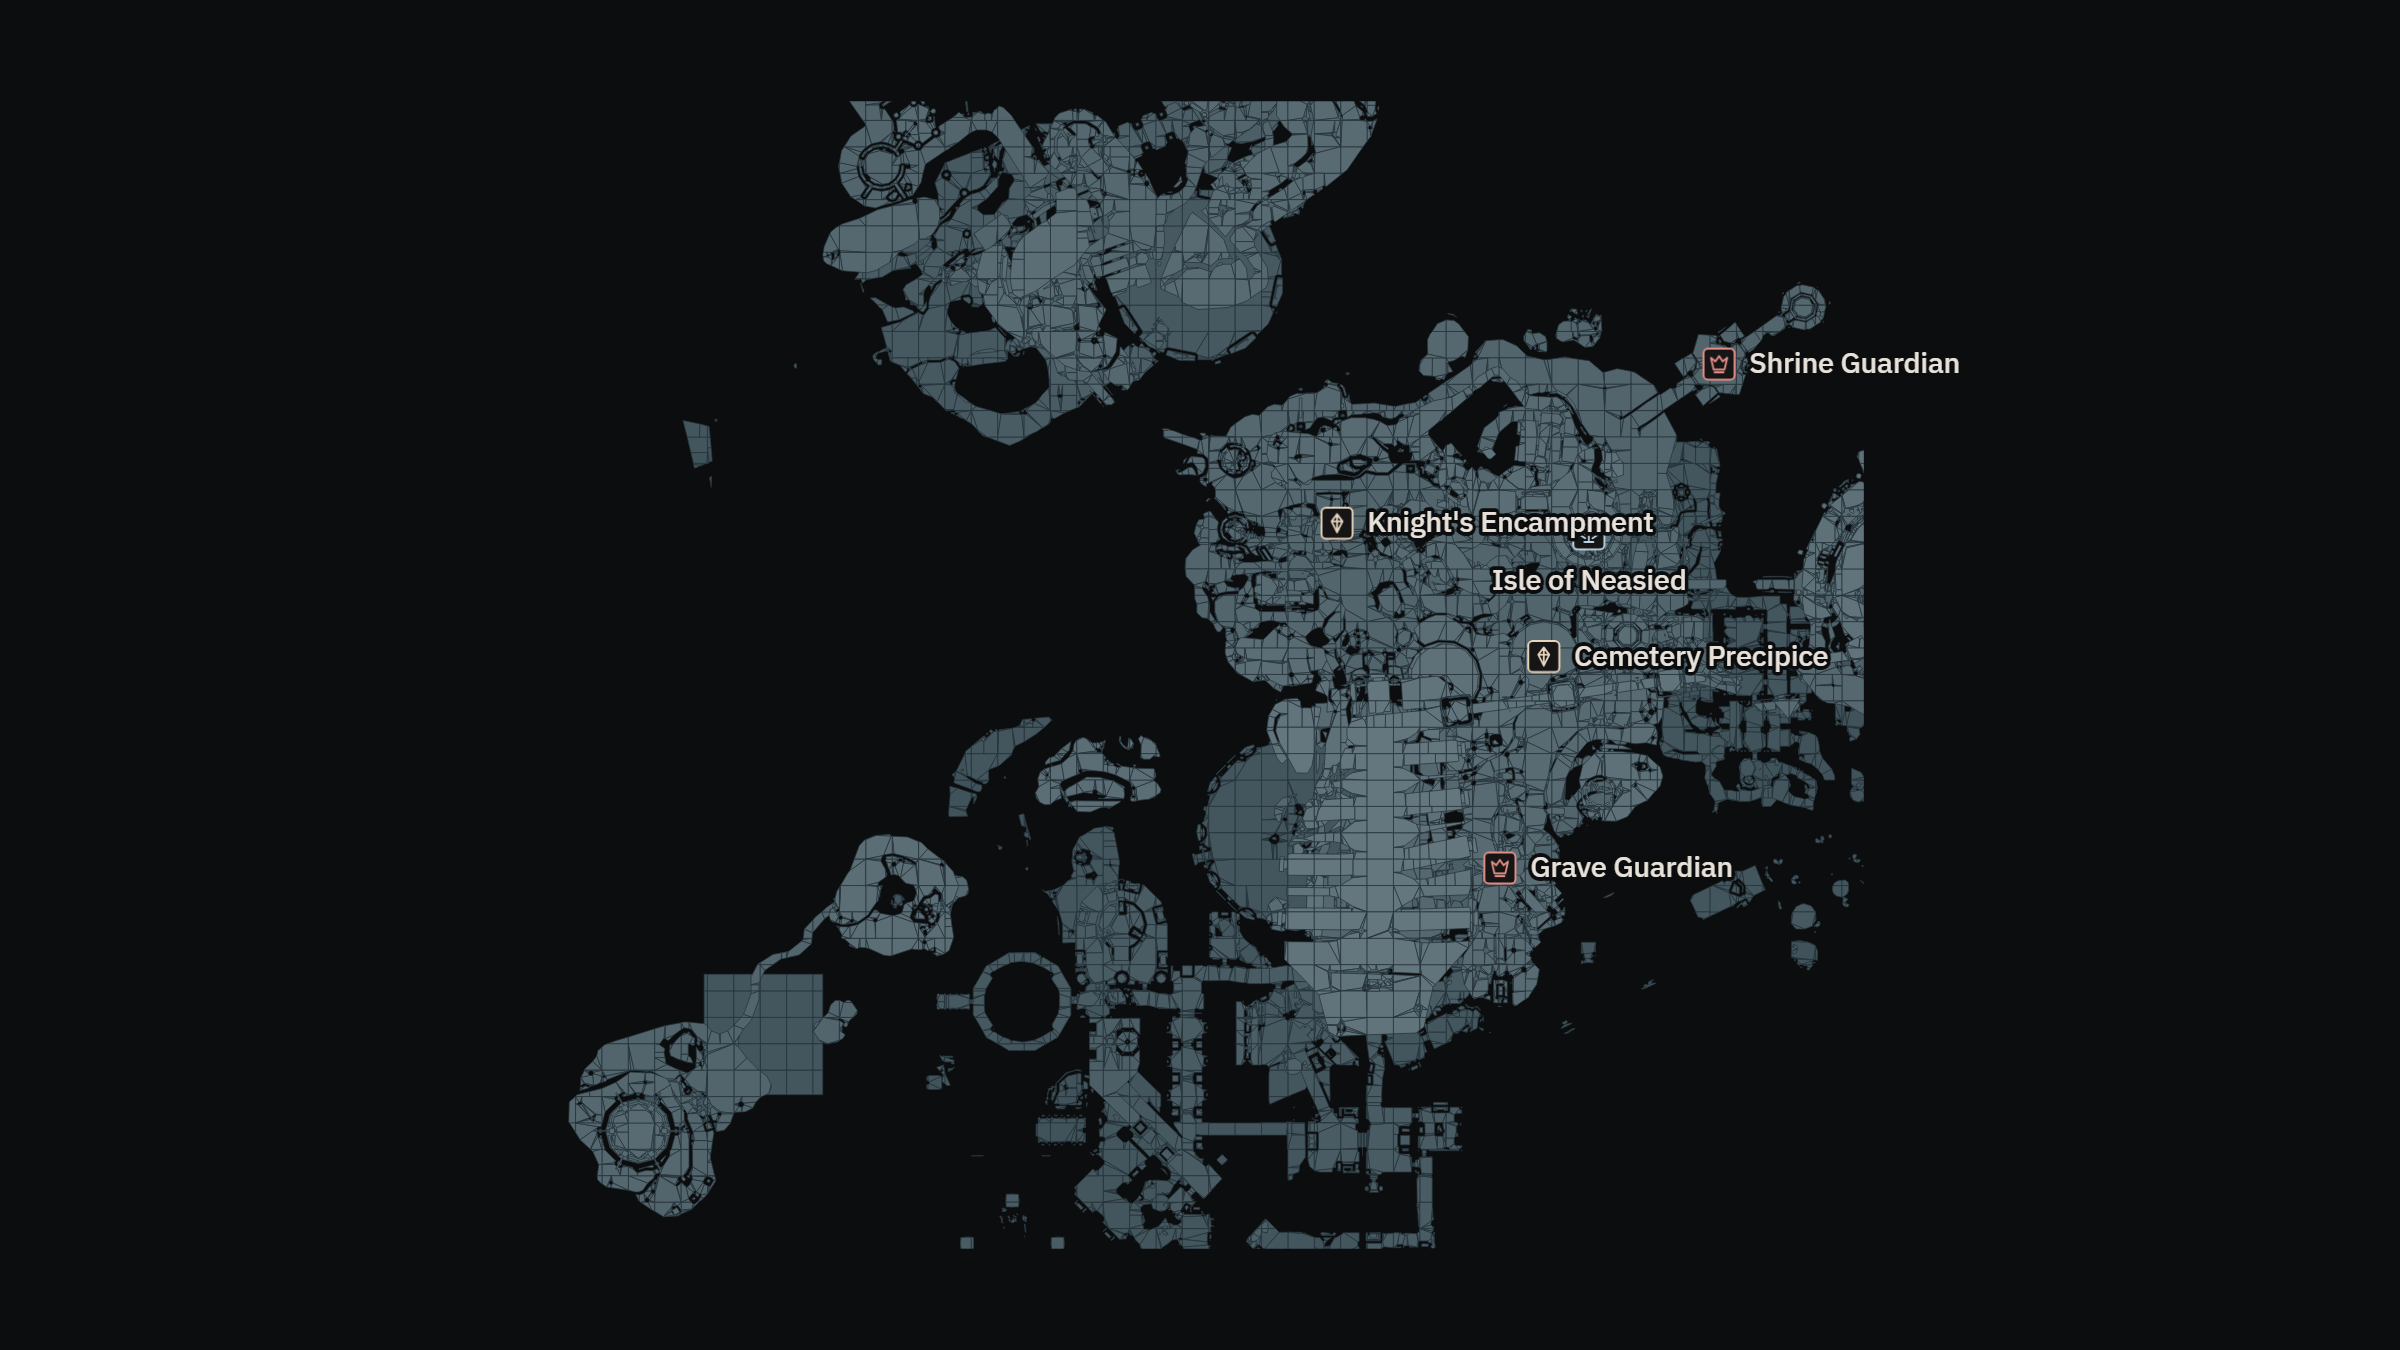
Pickups, evolutions and unlocks
Forged long ago by the ancestors of the Abraon family, this sword has spent countless generations slumbering on the Isle of Neasied.

A relic from a war fought long ago, thoroughly rusted yet retains a sharp edge.

A club hewn from a thick tree branch, leather wrapped around the thinner end to form a grip of sorts.

A common soldier's armament left to decay on the battlefield.

A siege weapon from a war fought long ago, the rusted metal head of the hammer is affixed to a creaky wooden pole. Slow to wield but has good reach.

Obtain Rusted Short Sword. Use it until it reaches level 10 (MAX). Its automatic evolution gives you Sipeha's Twisted Heart.

Collect Rusted Short Sword and raise it to its maximum level to unlock this shop item.

Collect Rusted Spear and raise it to its maximum level to unlock this shop item.

A giant golden gavel forged for King Gius. The king often presided over the royal court, and he purportedly did use this gavel to proclaim his rulings.

Defeat Mossy Golem and collect Golem Arm Crusher from its drops.

Collect Wooden Club and raise it to its maximum level to unlock this shop item.

A clay jar, crudely affixed to the end of a stick.

Obtain Rusted Spear. Use it until it reaches level 10 (MAX). Its automatic evolution gives you Jigeki's Serpent Thrust.

Obtain Wooden Club. Use it until it reaches level 10 (MAX). Its automatic evolution gives you Puwema's Blessed Orb.

Collect Jar Club and raise it to its maximum level to unlock this shop item.

Collect Rusted Longhammer and raise it to its maximum level to unlock this shop item.

Obtain Rusted Longhammer. Use it until it reaches level 10 (MAX). Its automatic evolution gives you Sipeha's Void Maul.

Obtain Holy Sword Endu. Use it until it reaches level 10 (MAX). Its automatic evolution gives you Soul Bound Endu. To forge True Holy Sword Akunra, bring Soul Bound Endu...
5 mapped entries

Chakram from the Kingdom of Ommu, used in the ancient war with the Kingdom of Bamaen.

Unlock Solid Stone Block by obtaining Wodaso's Power Cube. Collect the Strange Stone Block, then take it to Wodaso’s cube altar.

An unusually shaped one of a kind stone block that can be used as a throwing weapon. It's quite heavy.

Standard throwing dagger from the kingdom of Bamaen.

Collect the Strange Stone Block, then take it to Wodaso’s cube altar.
29 mapped entries


A refined powdered tree bark imported from the southern kingdom of Ommu.

Plump bright red berries that grow high up in the mountains of the Kingdom of Bamaen's mainland.
Chakram from the Kingdom of Ommu, used in the ancient war with the Kingdom of Bamaen.

A jar filled with strange dried spices from an ancient land. The contents are of unknown origin and still carry an unfamiliar yet sweet and pungent smell.

Necklace of a fallen Iryupe Raider, to be returned to Captain Aganmi.
A giant golden gavel forged for King Gius. The king often presided over the royal court, and he purportedly did use this gavel to proclaim his rulings.

A holy looking data module, you should bring to Ossi so he can analyze its contents.

A gold pendant of House of Abraon's crest. Held by members of the Abraon family to prove their identity when travelling abroad.

A strange fruit which grows in coastal regions during the winter.
A clay jar, crudely affixed to the end of a stick.

A small wooden charm, carved with a blessing of vitality. Its effect is minimal, however it carries a faint sweet smell which is quite pleasing.

A cure-all potion sold by traders from the western kingdom of Ritudeon.

A frail ancient short sword capable of a secret technique few know of.

A hard, pungent-tasting fruit that can be found growing deep underground.

A bottle of holy water from a hidden spring in the Kingdom of Epha. The location of this spring is a well kept secret, even among the rare explorer who would venture to...

Cave scorpion carefully prepared and served up on a skewer, crunchy and a bit sharp.

Skewered ojum lizard roasted over an open flame. It has been carefully gutted, leaving the liver intact.
A siege weapon from a war fought long ago, the rusted metal head of the hammer is affixed to a creaky wooden pole. Slow to wield but has good reach.
A common soldier's armament left to decay on the battlefield.

A silver statuette depicting an unknown avatar of the thunder god Wodaso.

The fragrant and sweet juice of an iron pineapple, aged and bottled.
An unusually shaped one of a kind stone block that can be used as a throwing weapon. It's quite heavy.
Standard throwing dagger from the kingdom of Bamaen.

This appears to be the grimoire of a witch, however its pages are all empty.
A club hewn from a thick tree branch, leather wrapped around the thinner end to form a grip of sorts.
Each location opens its exact marker
Encounter locations and bestiary entries
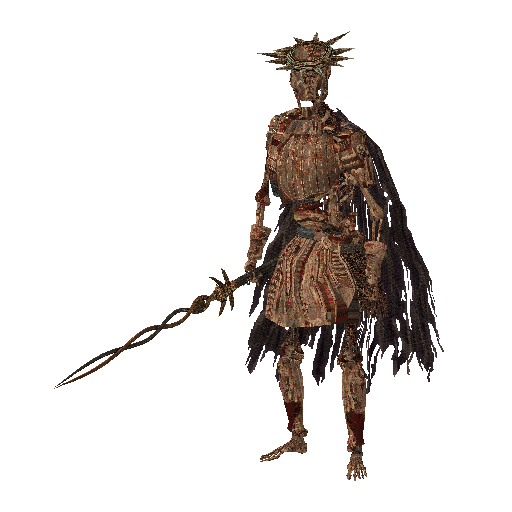
Bones of a powerful warrior who guards a long-forgotten tomb beneath the cemetery beside Deimpo Mausoleum.
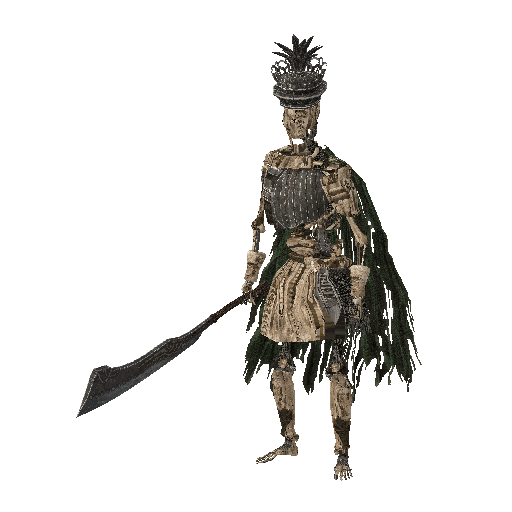
Bones of a powerful warrior who guarded the Shrine of Endu centuries ago, now reanimated by black magic.
Bestiary numbers retain their in-game order
Travel points, characters and marked locations